Saturday, October 5, 2013

Old Man Wargaming with Bryce: SAGA


Hey again dear readers, and welcome to those from Hitting on 3s.

This one is a little trick of the blogging trade, I have a lot more easeof use on my own blog, with pictures and stuff, but I want to write for the Ho3s. So thanks for following the link.

Today I will be doing the first textual installment of OMWGB and talking about SAGA, a 28mm Dark Ages skirmish game from Studio Thomahawk and Gripping Beast.

So crank up the Korpiklanni or Amon Amarth, grab a beer or better yet some Texas mead and let's talk about Vikings.


SAGA as I said is a 28mm Dark Ages skirmish game, you'll  only need about 20-30 figures plus a leader, depending on the group you play and what units you take. I'll talk about good sources for figures later.

But first, what makes SAGA unique and why should you give it a go?

SAGA has a interesting "gimmick" (a future topic for my podcast segment). It uses custom dice to activate your units and utilize special abilities themed around what group you are playing. So not only does this create a resource management aspect, the interaction of SAGA Dice with the Battle Boards allows for actions worthy of the sagas told for generations.

DICE & BATTLE BOARDS

Scots (the most beautiful I think)
 Vikings
Here we have some of the SAGA Dice Gripping Beast makes. 
They also have the symbols on their site to make your own if you are cheap like me. 

The way SAGA Dice work is you have a certain amount of them, up to 6 normally, based on your warband, you roll them at the start of your turn and place them on your Battle Board. A leader provides 2, units of Hearth Guard and Warriors each provide 1, and Levies provide none. We'll get into the units a little later. First up, Battle Boards.

Shamelessly taken from The Tapestry, WWPD's excellent SAGA department. 

So you place the dice you roll on the squares you want. The dice you need are shown next to the text. Basically it means common(1,2,3), uncommon(4,5), and rare(6), these allow you to pay the cost to activate a unit or use a special ability. Ones with multiple dice mean any shown can be used, if there is a "+" then both of the dice shown are needed to use the ability. For example, your Leader or Hearthguard can be activated with any type of die, whereas your Levy need uncommon or rare to activate. They don't follow orders as well. 

This is where the resource management comes into play, you can't always do everything you want to. You have to decide which units to activate and which abilities to use. Also, the number of dice you roll depends on what units are still on the table, so if you lose a unit of Warriors, you lose the die they provided too. So both offensive and defensive tactics come into play. 

RANGES

A quick note on how range and movement work. Everything is a set length, Long(L 12in), Medium(M 6in), Short(S 4in), or Very Short(VS 2in). For example, bows shoot L, troops move M, or move through uneven ground S, and a unit must keep its models with in VS of each other. 

UNITS

In SAGA there are only 4 types of units, a Leader, Hearthguard, Warriors, and Levy. When making an army to play a game(usually between 4 and 6 points), 1 point= 4 Hearthguard, or 8 Warriors, or 12 Levy. You get the Leader for free. Hearthguard have the best armor and roll the most attack dice, Warriors are in the middle, and Levy are lightly armored troops usually armed with missile weapons. 

Now there is more variety added in individual army lists, for example the option (or requirement) that certain troops be mounted, as with the Norman knights. Or the option to take special weapons, like Danish great axes or Norman crossbows, or Welsh javelins. 

MECHANICS
The heart of the rules is the interaction of SAGA Dice on the Battle Board, the skeleton is how units fight. Basically you roll a certain number of attack dice against the enemy, those that meet or beat their armor value are a hit, the enemy then gets to roll defense dice, on a 5+ the hit is cancelled, otherwise a model is removed as a casualty. Each side does this when a melee is fought. 

Ok, that is super simple right? That's the whole point, SAGA is layers of simple systems stacked to make a delicious cake of a fast fun wargame. Here are a few more of the layers, different unit types have different numbers of attack dice and armor values. You can also chose to give up a number of attack dice to gain more defense dice. For example Hearthguard have 2 attack dice each and an armor value of 5, while Levies have 1 attack die per 3 models in melee and an armor value of 3. Also, there are shooting attacks, which is where Levies "excel", they get one attack die per 2 models, and usually a L range, the enemy can't attack back with ranged attacks. 

Here is SAGA's other really cool mechanic, Fatigue. This is gained when a unit activates more than once in a turn, after melee, and if another unit is wiped out near by. Fatigue on your unit can be spent by your opponent to gain a bonus. Such as reducing movement by one step, or in melee you can spend the opposing unit's Fatigue to gain one armor, and/or reduce their armor by one. Also, if a unit is shooting at you and has Fatigue you can spend their Fatigue to gain one armor against the shooting attack. 

This is one of the trickier parts of SAGA, though it's still pretty simple, so how about an example? 

Your opponent's unit of warriors has one Fatigue from moving previously in the turn, they activate a second time to move into contact with your warrior unit. So when they move into contact, you can spend the Fatigue  on the opposing unit to reduce their movement by one step, so fewer models make it into contact, or you could reduce their armor by one or raise your armor by one. So the score you need to hit the opponent would be a 3+ after spending the Fatigue, or the score they need to hit you would be a 5+. You can do one of each of the three options in the same melee if there is enough Fatigue. 

Alright that's enough about the rules of SAGA. If you want more information, go get the book or find someone local that plays. It's a very cool game. 

MINIATURES
There are a lot of great manufacturers for SAGA appropriate minis out there. 

First of course is Gripping Beast, they have excellent plastic boxed sets of Viking Hirdmen, Saxon Thegns, and generic Dark Ages warriors I think they come 20 or 30 men to a box. Also metal sets designed as 4 point starter sets of SAGA. 

Next on the plastic wonderfulness is Wargames Factory, they have Vikings and Saxons, both armored and unarmored, I bought a box of each for my SAGA Viking guys. You can often get them $15 a box at online retailers, and there are 32 minis per box, with swords, shields, spears, and bows. 

Next for guys who love metal I would recommend Atrizan Games, all of their miniatures have a lot of personality, though you will need brass rods to make spears for them, they sell these as well. 

For Normans, you can't get much better than Conquest Games, they have plastic knights and warriors, as well as a set of eight metal crossbowmen, perfect for the Norman's unique warrior unit.  

There are plenty of other companies, these are just ones I've found and like, or have heard good things about. 

Thanks again for stopping by. 


Tuesday, September 10, 2013

Hobby Variety Hour

Hey folks,

Here's some pictures and such about what I have been working on hobby wise lately.

First of all here are some Flames of War vehicles I have been working on to reinforce my Airborne.


Here we have a full platoon of M18 tank destroyers, with security section. 

These are M4A1 Shermans from Plastic Soldier Company. 

Here we have Khaleesi supervising me working on some light 105mm artillery.

The start of my new Steelheads force for Warmachine. We have our Warcaster Captain Damiano, a full Unit of Steelhead halberdiers, a minimum unit of Steelhead cavalry, and Stannis Brocker. This is 

Now onto some other geeky things I have been into lately that don't involve glue and paint. 

Above is a shot of me reading the Numenera core rulebook at a great bar called Hay Merchant here in Houston. I'm drinking a 512 Pecan Porter if anyone cares, it may be my favorite beer. Numenera is a recently Kickstarted RPG from Monte Cook, he got to make the game he always wanted. Every new part of the game I went through I kept thinking, oh wow that's so elegant or well done for all the mechanical aspects of the game. It uses a d20 for almost all rolls, but is nothing like other games out there right now. Also it has the most useful and relevant GM's section that I have ever seen.

 I totally recommend this game for someone looking for a new experience. 

Now onto what I had a friend ninja me from GenCon, the new Iron Kingdoms RPG setting book that focuses on the Iron Kingdoms themselves. The history of the 5 Iron Kingdoms is presented in great detail, as well as adding a lot of new player information, with new careers, and modified existing ones, as well as equipment, a ton of new warjacks, a few new labor jacks, and new themes for your adventuring group. I totally love this book, it's just shy of 400 pages of goodness. The only thing is I wish it was a little more focused on the day to day lives and culture of the different Iron Kingdoms instead of mostly a list of kings and battles and coups. The good stuff in my mind is the detailed information of the different regions, cities, and such subdivisions of each nation. Now you have a place for your character to be from, or a place for them to belong and adventure in. 


Now for a few things that I have received from projects I backed on Kickstarter. 

 Deadlands updated to the 1930s, and beyond with the companion they also produced with the Kickstarter campaign. Good stuff.
All the cool stuff from the first year of d20 Monkey one of my favorite geeky webcomics. I can't wait to see what else he has in store for future projects. 


Tuesday, September 3, 2013

Podcasting Happenings.

The best stock photo a Google search can buy. 


Hey folks,

This week I'm going to plug a bunch of podcasts that I enjoy and listen to.

First of all, I'm now a "Foreign Correspondent" on the Hitting on 3s Podcast. All the way down here in Houston, I've done the first of an occasional series, called "Old Man Wargaming with Bryce", where I talk about my hobby experiences in historical wargaming so far and introduce it to a 40k audience.

The first installment of OMWB can be found on Episode 31 of the podcast. I'm working with the Ho3s boys to get another one recorded about the hobby aspects of historical wargaming for the 40k player. Hopefully that happens soon.

A new to me podcast is After Ullanor, dealing with the Horus Heresy books. I'm only a couple episodes in and I'm really digging it. It's been a while since I read the books as they were coming out. So the earlier stuff is a little hazy. I now want to go get Horus Rising at HalfPrice just for how good they make it sound. This is an offshoot of the Garagehammer podcast, I'm not familiar with them, but I'll give them a try too, even if they are square basers.


Another mention is Deep Strike Radio, I never really got into the story of the Dawn of War games, I was just thrilled to have a 40k RTS. So I didn't know much about the Blood Ravens chapter, but thanks to the latest episode I am chomping at the bit to make a force for them. Lots of Librarians, seeking knowledge, a mysterious(loyal Thousand Sons remnants) origin. They are basically what my 3rd Ed homebrew chapter was but given professional writers that know a lot more about 40k than I did at 13 and 14. So yeah, way cool.


That's all for now folks.

Wednesday, August 7, 2013

Flames of War: Air Support.

Hey folks,

Here are some pictures of my freshly painted P-47, ready to rain destruction upon the Axis powers.

I'm reading Citizen Soldier by Stephen Ambrose currently, and artillery and air power were how the US got out of Normandy. So glad that I have plenty of both.


Wednesday, July 24, 2013

Flames of War: Battle of Six Armies at Caen.

Hey Folks,

Here is a nice big post about and nice big game I played last weekend.

The pictures are ones I took, and those I got from the other players, the text is from my teammate Gerald, any text I add will be in italics.

So for the sides we had Brits, Canadians, and my US Airborne, against German Wermacht and SS forces.

Germans: Bryce (yes another one) with a company from the 503. Schwere Panzer Kompanie, Jessie with a Beute StuG force from the 21. Panzer Division and Jim with 2. SS Das Reich, also my fiercest opponent Jim's adjutant Elizabeth, his 12 year old daughter.

Allies:We had Gerald with 15th Scots infantry company, Tom with 4th Canadian Armored, and me with my 101st Airborne. We had 22 tubes of artillery all together.

21st Panzer reinforced by 2nd SS Das Reich and 503rd Schwere Pz. Kompanie

Versus

15th Scottish reinforced by 101st Airborne and 4th Canadian Armoured

Mission:           HOLD THE LINE

No. of Players:  6

Background:  The battle occurred on the southwestern outskirts of Caen. The industrial sector of Caen (German half of table) had been reduced to rubble by prior Allied bombing but the remainder of the table (Allied half of table) was gently rolling countryside with occasional bocage and the village of La Mort des Boches. The 21st Panzer has been badly degraded after a week of ongoing actions so the decision is made to reinforce it for the attack. Allied intel knows something is coming and calls up the 4th Canadian Armoured for support.

 Germans setting up. 
 German right flank, with the 21. Panzer, facing off against my 101st.
German left flank, King Tigers and lots of armored infantry. 
Forces deployed looking over our great table, set up by Jim based on a suburb of Caen. 

Allied deployment, lots of artillery but most everything else was in reserve. Looking at all that armor Jerry has, we're gonna need a bigger boat. 


German Turn 1: Germans decided on a bold coup de main directed at the nearest objective.  This lay on the Allied right/German left flank. The King Tigers and a platoon of mechanized infantry in Sdkfz 251’s struck straight across the open fields for the objective. This was apparently only defended by a dug in platoon of Canadian infantry. Things looked grim. Could the game be over this quickly?  The 21st Panzer moved out in full on the Allied left/German right in a pinning attack. They equally faced only a dug in airborne platoon. Das Reich advanced up the highway in the center, daring the Allies to challenge them. The center looked totally undefended, nothing but a recon unit of Humber armoured cars. Had they really caught the Tommys napping? In a stroke of luck for the Allies though, the German 105 battery and the Nebelwerfer battery both fail to range in.


German advance. They're coming right for us!


Allied Turn 1: The Scots deploy a battery of 2x 17lbers from ambush right on the objective. The Canadians and the Scots both roll for Typhoons and bring on 2 planes each. The Americans range in with a total of 10x 105mm guns. Time on Target, baby! The Americans wreak havoc on the bunched up Beute Stugs and halftracks. They kill a Beute Stug, an Sdkfz 250 and an Sdkfz 251. The German infantry escape from the tracks. The Scots range in with a total of 12x 25lbers. and catch the lead 4x Sdkfz 251’s of the “coup de main” and destroy 3 and kill the transported infantry in 2 of them. The 17lb  A/T guns and the Canadian 2ic’s Sherman both kill an additional halftrack but the transported infantry escapes. This guts the mechanized platoon. On a better note for the Germans, their flak is withering. No Typhoon makes it through. This would continue for most of the day. No joy for the “Jabos”. The Scottish recon in the center wisely pulls back behind the woods to avoid the onrushing Das Reich Mark IV’s.

Now which one was Mike? He was the target.

American Artillery, excellence through applied science. TOT Bombardment. 


German Turn 2:  In a surprising move, the Tigers on the German left, now stripped of supporting infantry, pull back and engage at rage with their superior guns. The combined fire from two up-crewed German 88mm guns and the King Tigers is deadly. They combine to kill a dug in 17lber and also killed a dug in 25lber. To add insult to injury they used their remaining shots to kill the platoon leader of the dug in Canadian infantry. On the German right, the 21st Panzer shrugs off the American artillery and advances up the road and turns left to join with their Das Reich partners in the center. They move at speed down the bocage lined road. The Mark IV’s and Sdkfz 250/9’s of Das Reich race down the road all the way to the highway cross road, well into the Allied deployment zone. The German 105’s range in on the Scots battery but fail to score any hits. The Nebelwerfers range in and pin the 25lbrs and also kill another dug in gun. The Allied radio net is alive with requests for support. They are told to hang on. No help coming for a bit longer. The Allies are looking very worried.

The Big Cats learn caution for once after the massive bombardments they suffered. The soldiers of the Empire still look very thin on the ground around the objective. 


Allied Turn 2: The Americans rake the 21st Panzer yet again with a devastating barrage. The shellacking bails the 21st’ sole King Tiger, kills another Beute Stug, and bails 3 more halftracks. The bocage lined highway has become littered with burning vehicles. The Scots recon, in a brave effort to help stem the German tide and buy time for the reinforcements, moves into the highway of death and manages to kill a Beute Stug and a halftrack also killing the transported infantry. The Canadians reveal an ambush in the bocage at the cross roads and shred Das Reich’s lead elements. The Germans lose two Mark IV’s and two Sdkfz 250’s from Das Reich’s recon element. Canadians roll for Typhoons and bring on 2 planes. Scots elect to wait for air until the German flak has been degraded. The Scots’ sole remaining 17 lbr reaches out and kills one of the German Sdkfz 7 AA vehicles. The result is predictable though, the lone remaining Sdkfz 7 coupled with the 20mm AA of Das Reich is more than enough to see off the Typhoons. The Canadians reveal an ambush. Their M-10 Achilles move out onto the flank of one of the three King Tigers to their front and try to kill it, but it takes every vehicle firing. One King Tiger dead and two remaining on the German left. The Scots’ battery unpins and fires but does no damage. German losses have been heavy but nowhere near heavy enough to blunt the attack. The Allies look grim.
 You can see both ambushes here. 

My Americans holding down the left flank only through massive firepower. 

German Turn 3:  The Germans continue to take the fight to the Allies. On their left, the 21st Panzer’s King Tiger refuses to unbail but the remaining Panzer Grenadier platoon dismounts and moves into the woods while the remnants of the Beute Stugs move to the flank of  the Canadian Shermans at the cross roads, ignoring the Scots recon. The Beute Stugs both miss. One of Das Reich’s Mk IV’s then fires on the Canadians and hits but fails its FP test. The Scots recon breathes a huge sigh of relief until they see the reason they were ignored so far. Das Reich lashes out at them and kills four of the Humbers with the fifth failing its morale and leaving the table. All of Das Reich’s panzer grenadiers move to join the remaining two King Tigers to renew the original assault on the nearest objective. The 503rd is a whittled down but still very lethal force and now chooses to prove it. The Tigers kill all of the M-10 Achilles. The Nebelwerfers pin the Canadian infantry and the Scots artillery. The 88’s pin the remaining 17lber. The Allies look feeble indeed.


German Armored advance in the face of heavy fire. 

Allied Turn 3: The Scots roll and get one platoon, a confident veteran Sherman tank platoon which contains a Firefly. The Canadians also get a Confident trained Sherman tank platoon with a Firefly and the Americans bring on an 81mm mortar battery, but it is on foot and won’t play a part in the game. Desperate times call for desperate measures. The Americans spring two ambushes at once. Their 57mm AT guns are placed to counter the remnants of 21st Panzer as they roll relentlessly forward and a platoon of Shermans moves to counter the thrust by Das Reich at the crossroads. The 57mm guns kill the final half track for the 21st Panzer Grenadiers. The panzer grens are walking now. The American battery slams into the pitifully few remaining Beute Stugs of 21st Panzer bailing or killing the remaining vehicles except for the bailed King Tiger and the two AA halftracks. One Beute Panzer fails morale and leaves the table the other avoids a test because all 4 vehicles are bailed and none dead. The Canadian Shermans at the crossroads kill one Beute Stug and bail the other and kill the final Das Reich Mark IV. Scots Typhoons and Canadian Typhoons shift tactics and attack the Nebelwerfer and 105 batteries as they aren’t defended by flak and pin both batteries.

Ambush reinforcements have arrived. Helping stall the German onslaught on the left. 
But the objective is on the right. 

German Turn 4:  On their left, the Germans seem unstoppable. The face only a leaderless Canadian infantry platoon and a single 17lber gun dug in on the objective. The attacks continue all along the front with only the Americans appearing to have stopped their foes and the objective is on the opposite flank from the Americans. The Nebelwerfers fail to unpin, but the dangerous King Tigers move to engage the Canadians at the crossroads and kill a Sherman. The 88’s fire on the lone remaining AT asset, the 17lber. They get two hits, but the Scots save the gun. Time is becoming critical as the Allies begin to get reinforcements. The Germans now order that all storm trooper moves are to be made forward towards the enemy rather than into cover. They appear to have thrown what little caution they had to the wind. The 21st Panzer unbails the 4 remaining Beute Stugs and they move out, but their King Tiger remains bailed.
It looks a lot worse for the Germans than it is, many of their forces remain active. 
My Shermans took a licking but kept on ticking. 
The first time I've had a tank platoon not run off the table due to morale.


Allied Turn 4:  The 17lber fails to unpin. Both the Scots and the Canadians roll and receive 2 Typhoons apiece and decide to brave the flak and try to stop the immediate threat to the objective, the King Tigers. They will fail. The flak is simply too deadly. The Americans open up with their 105’s again and bail 3 of the recently remounted Beute Stugs. A Canadian Sherman manages to kill a Das Reich halftrack. Those Shermans coming from reserve better be double timing it. The Canadians and Scots have nothing to stop the lumbering King Tigers.

Even hitting them with everything they've got, the Allies are hard pressed to stop the King Tigers. 
Also, there's a lot of infantry waiting it's chance. 


German Turn 5:        

This is the money turn for the Germans. Time is running out (players have to get back to home and hearth). They have to take the objective or die trying. The Das Reich Panzer Grens move out of the woods, preceded by their halftracks. The halftracks set up the assault on the Canadian infantry. The two remaining King Tigers fire on the Shermans providing support to the infantry and the 88’s target the 17lber.  Disaster! The Tigers fail to get a single hit on the Shermans. The 88’s get one hit on the 17lber, but the Scots pass their save and hang tough. The 21st Panzer is down to one King Tiger, whose crew finally decides to unbail and two Beute Stugs, but they gamely fight on. These manage to kill 2 of the American Shermans and keep them from moving to support the Scots on the objective. Das Reich’s assault now goes in. It turns out to be a suicide charge. The Shermans roll 4 dice in defensive fire and get four hits and four kills. The halftracks are all dead.

The battle hinges on a 17pdr, and a handful of infantry and Shermans. Can they do it?

They don't like it up 'em!


Allied Turn 5:

The Scots artillery pounds the advancing Das Reich grenadiers, killing seven stands. The Americans rake the surviving elements of 21st Panzer and the Typhoons finally get 2 planes through the flak screen and bail a King Tiger. Additional Allied reserves are reaching the front lines and more are finally arriving. At this point, the players decide to call it a day. This was one of the closest games any of us can ever remember. It literally could have gone either way. The star for the Allies was undoubtedly the artillery. For the Germans it had to be the flak. Both did their jobs superbly all day.


Reinforcements streaming in spell the end of the German counter attack. 
Also, it was dinner time. 


Allied Victory 4:3
But the line held. 


The losses on both sides were great. The Allies held against the counter attack, but only just. 


This was an absolutely wonderful game. Great players, great terrain, and great fun. Now I need to get my guns painted up so they aren't such an eye sore. 

Thank you to all my fellow players, and especially Jim for bringing the terrain and setting it all up for us. He built the table based on aerial  photos of the outskirts of Caen. And to Gerald for doing the writing, both taking notes are the game and working up this wonderful play by play you see here. I just but together the pictures of the excellent terrain and the dramatic run down of the game. 


Sunday, July 7, 2013

D-1: First Flames of War Game

Earlier this week I played my first full game of Flames of War. It was a blast!

I pitted my 101st Airborne and Glidermen newly dropped into France with a few tanks and artillery pieces that had rushed up from the beaches against a Beute StuG company from the 21st Panzer division.

We played on a great table full of wonderful Normandy appropriate terrain, a free for all battle that I ended up losing 6-1, due to losing a couple platoons. Well onto the pictures and what little I can remember.

Such great terrain, this is the village I defended. 
The whole table, with both parts of the village the Germans held the left side with a large number of cobbled together big ass guns on small tank treads. Easy to knock out with anything of substance but they hit like a truck. I think they have PaK 40 guns on them. 

 One of my paratrooper platoons and glider anti tank guns next to a few gliders they attacked the village in. Loved those gliders, such great touches on the board.
The brief hurrah of my Shermans, rushing up to face off the tank horde coming my way. They knocked out a couple but lost two and failed a morale check and ran off. 

Beute StuGs and armored cars rushing onto my flank after the Recon Jeeps disengaged. 

 The aftermath, I created a line of wreckage along the river but couldn't get past the German defenders without more anti tank assets.

The 101st couldn't get beyond the Germans, but at least they tied up those mobile anti tank guns before they could reach the beaches and slaughter US armor.

Lessons learned.

Flames of War is a tank game first, I need more ways to kill them. Deployment is key. And while infantry are rock hard when on defense, they are vulnerable on the move. I need to get more games in and get some more tanks, and figure out where I can get anti tank assets in the force I've chosen.

Also, the US forces have a lot of depth and use a lot of the same units across forces, I get some tank reinforcements and I could easily have a tank company.

Friday, May 31, 2013

Alamo GT Part 3, Day Two

Hey folks,

After Saturday Jack and I were tired and thought maybe a few less beers would help our rankings.

I was floating around the middle all weekend, Jack ended up in the overflow room that I termed "The Alamo Centre for Kids Who Can't Roll Dice So Good". It was actually a pretty sweet set up, laid back, well air conditioned, and quiet. I was jealous, the guys in here were hoping they didn't do so well to get bumped up to the main room for game 5.

Here's some more army shots.


 These were the Eldar I faced in game 5.


 John Wayne's Necrons.

 LOVE THIS HELLDRAKE


 He said it's not hard if you start with the green. Sure.

 Holy crap I want this and all the rest of them. When I win the lotto, Heresy army.
 I think this is the only picture I have of the great looking White Scars, that I played game 4.


 Just marvel at the subtle blending on these tyranids. These picture don't do them justice.


GAME FOUR
I forgot to take any pictures of game four, it was against a cool guy named Yon, with White Scars. It was my only win. Due mostly to the mission type and getting some good psychic powers that helped me negate night fighting the first turn and start wiping out bike squads turn one. This was the only game that my army ran on all cylinders, everything came up Milhouse. I claimed the objective and secondary, getting max points. 

GAME FIVE
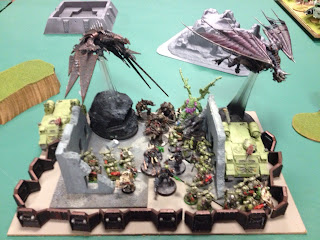
I only got a few pictures of this game, I forget the guys name, but he had a mostly wraith Eldar army and beat Jack round one. It was a rough kill point game. I didn't take the initiative and go for the throat, I should have tried. It didn't work out very well for me. This is the only shot I got of the game. Once more unto the breach dear friends. We did close the wall with our Space Wolf dead. This was another loss. 

I ended the weekend 1-2-2, tired and having had a hell of a lot of fun and a lot of beer. I can't recommend Alamo GT more highly.  

 Finally here's just a good portion of the terrain from the tournament.